August 28, 2024

News

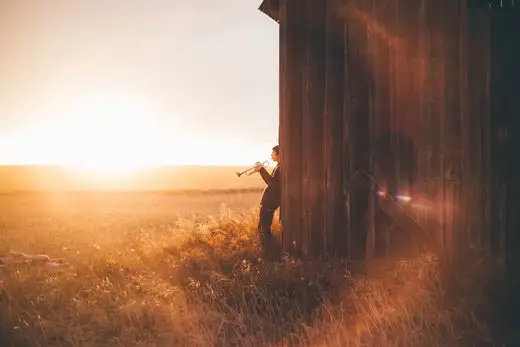
Student Feature: Mastering the Five Core Elements for Musical Success

Preparing for a music school audition or a professional job interview can indeed feel like a scene from a gripping movie, filled with tension and anticipation. Yet, breaking down the process reveals that success hinges on mastering some fundamental skills. Here’s a breakdown of those essential elements: As an advanced player, harmonizing with others requires adjusting notes slightly to match the surrounding harmony. This involves relying on your ear rather than a tuner, as you’ll need to adapt to the specific context of the music. In essence, mastering these five elements—Sound, Intonation, Articulation, Rhythm, and Style—can greatly enhance your chances of success in auditions or professional performances. With diligent practice and attention to detail, you can navigate the challenges and emerge as a confident and skilled musician.  Interval Example Adjust Higher Note (in Cents) Minor Third C to Eb +16 Major Third C  to E –14 Perfect Fourth C to F -2 Perfect Fifth C to G +2 Minor Sixth C to Ab +16 Major Sixth C to A -16 3. Articulation Articulations lend definition and character to the piece you’re playing. They must be intentional, clear, accurate, and well-suited to the given passage. Your listeners shouldn’t wonder if your notes were legato or staccato! To refine your articulation, practice Clarke’s Technical Studies using the same articulation for an entire exercise at a time – whether that is legato, marcato, staccato, or accented. Be sure the tongue always hits the same place to give the exact same sound to each note. Slow, diligent practice will enable you to hear what exactly you need. Listen carefully to what you are doing; when you can hear your own inaccuracies, you can fix them easily. To attain the highest rank as trumpeter, you will need flawlessly consistent articulation. 4. Rhythm Rhythmic irregularities are just as noticeable as out-of-tune notes! When performing, perfect rhythm is a must. Make sure you understand the rhythm – how it lines up with both the beat, as well as how it is subdivided within the beat. This may require intellectual effort! Take the time to sit down and do the math. Mark with a pencil where the beats fall; then turn on the metronome and speak the rhythm out loud, making sure that the clicks you hear occur in the same places as the ones you’ve marked. Next, play the rhythm on the trumpet with the metronome, but on a single note. Finally, add the correct notes. Work daily with the metronome to keep your tempo steady and help clarify your understanding of the rhythm. While it’s useful to train yourself to keep the beat with your feet or toes (this requires feeling the beat internally), there is also no substitute for the unerring accuracy of a metronome. To get the best of both worlds, it’s a good exercise to play the passage while tapping your foot, with the metronome on. If you don’t already own a metronome, you can either get a stand-alone device or buy an app for your smartphone or tablet. Whichever you buy, be sure it can play subdivisions of the beat, especially for complex passages. Once you can play accurately with the beat subdivisions, then you are ready to work with larger beats. As a side note, make sure you practice with a pencil at the ready! Your music is for study and active engagement, not hanging in your living room. Effective markings allow you to not waste your chops playing the same passage wrong over and over again. Be specific, concise and legible, so that tomorrow you don’t have to figure out the same problems all over again! 5. Style Often students play with one style – loud and fast! Once in a while that sets the perfect mood, but unless your name is Tim Morrison, it’s possible that there are some nuances you’re missing. As you begin to explore this aspect of your playing, there are three main areas you should consider: the composer’s intentions; historical period; and mood. a. The composer’s intentions Look at the tempo marking in the music, dynamics, and any other markings. Research what each marking means. Is it a fanfare, ballad, march, lament? Listen to recordings of your piece, as well as other works by the same composer, to learn the composer’s sound and style. Learn to match your own playing to the recording. For contemporary pieces, you may need to contact the composer directly to obtain a recording of the piece. If you are an advanced player, it may be illuminating to listen to recordings of many works by the composer of your new solo, excluding recordings of your actual piece (at least for a few weeks). This will allow you to flex your creative muscles in forming your unique interpretation. b. Historical Period From the Middle Ages to the Renaissance, Baroque to Classical, Romantic to 20th Century, each period of music has its own palette of sounds. Find out a little bit about the composer and historical period of each piece you begin. For example, say you just got the music to Telemann’s Trumpet Concerto in D. You discover that the piece is Baroque, which means that its emotional qualities should be expressed tastefully and in moderation. You focus on clean, clear articulations and distinct contrasts between loud and soft. Once you can play the notes accurately, you add musical ornaments such as mordents, trills, and appoggiaturas. After finishing the Telemann, your teacher assigns you the Hindemith Trumpet Sonata. You consult your musical dictionary and discover that a sonata is essentially a duet between the piano and trumpet. You begin to familiarize yourself with both parts and how they fit together. In talking to your teacher, you learn that Hindemith wrote the piece in response to the genocide in Europe during the first world war. You seek ways to express the darker qualities of the piece through your dynamics, vibrato, and tempo. c. Mood When a composer writes p or f in the

News

Starting the Trumpets

As one of the flagship sections of the band, a good trumpet section can set the tone for the rest of the ensemble. This article addresses how to identify and cultivate beginning talent on the trumpet. If you are a new director, and particularly if trumpet is not your primary instrument, you may find that these step-by-step instructions provide you with some structure and guidance as you begin to develop your own routines and methods. If you are a more seasoned director, the ideas in this article may complement and add to your existing repertoire. CHOOSING YOUR TRUMPET SECTION The first step in helping students choose an instrument is assessing their physical characteristics. This part of the process can be sensitive for some directors, who feel that it implies that students may not “be able” to play the instrument they hoped to play. However, ignoring students’ physique is ultimately selling them short, since they will experience the most success when their instrument is a good match for them. The ability to form a working embouchure and produce a consistent buzz is a good sign that the student is well suited to the trumpet. If they have difficulty with formation and buzzing or are not ideally suited to the instrument in other ways, you can help them make a fully informed choice, while respecting and supporting whatever decision they make. The guidelines in this section will give you something to look for on instrumental choice night, when the students have an opportunity to find out if the trumpet is a good fit for them. Dental characteristics Examine the student’s dental structure. If a student has any front teeth that are protruded, sideways or missing, the student may be limited in their comfort and embouchure development if they are unable to make the necessary adjustments. While there are many famous players who have irregular teeth, each student will need to overcome these idiosyncrasies in order to develop correctly, and some problems will cause greater frustration than others. It is not unusual for the student to have an overbite or underbite, which will create unevenness in mouthpiece pressure and lip vibration. This unevenness will tend to impede embouchure development, sound production and endurance. An extreme overbite or underbite will greatly hinder their chances of being successful at the instrument. If a student with irregular dental structure chooses to play the trumpet, they should begin private lessons as soon as possible. A good teacher can help the student balance their embouchure and mouthpiece placement. For example, students with an overbite may need to push the lower jaw forward to create a more balanced playing surface and correct the direction of the air flow. Shape and size of the lips Students’ lip characteristics will affect their success on the trumpet, and will also determine which mouthpiece is most suitable for them. While there is some individual variation in mouthpiece preferences and lip characteristics, there are a few general guidelines that teachers can use to help students get started. While the 7C or 5C mouthpiece is the most common for beginners, the mouthpieces referred to below (Bach sizes 5B and 10 ½ C) should also be available during the screening process for students with different lip sizes, so the teacher can identify the best fit. This way the student can purchase the appropriate size when they go to rent or buy their instrument. Students with larger lips will be more comfortable on a mouthpiece with a wider inner rim (the open center of the mouthpiece), such as the Bach 5B. A large inner rim will allow the student’s lips room to vibrate, while an inner rim that is too narrow will pinch into the fleshy part of their lips, causing issues in tone, aperture flexibility, and endurance. While many directors may suggest trombone or tuba for students with very full lips, these students can be excellent trumpeters with the correct set-up and mouthpiece. While students with slightly thinner lips can play a standard 7C mouthpiece, players with extremely thin lips should choose a mouthpiece with a narrower inner rim, such as Bach 10 ½ C. If the rim is too large, the students will have to use additional mouthpiece pressure to make the lips vibrate, and the mouthpiece will demand more embouchure strength than they have. The result will be soreness and poor endurance. Some students may have a teardrop lip, in which the front part of the lip comes down further than the rest of the top lip. Since this lip formation can lead to an unreliable response, fluttering in the sound, a downward air stream, and aperture control issues, the teardrop lip is generally not well-suited to the trumpet. If a student with a tear-drop lip has their heart set on playing trumpet and understands the difficulties associated with their lip shape, private lessons can help them develop strategies to minimize its impact on their playing. Since there are several techniques the student will need to use in establishing a good, working embouchure, early tutoring will be crucial to their success. The Schilke 13C4 can be a good mouthpiece choice for students with a teardrop lip. It is comparable to a Bach 3C, but it has more rim surface area and is slightly more flat, helping to stabilize the teardrop portion of the lip. Its more funnel-shaped cup also allows the lips room to vibrate. Testing embouchure and buzzing To assess a student’s aptitude, you want to assess their control over their lip muscles and their ability to use their airstream effectively. To form the embouchure, have the student make the sound “emmm.” Tell them to keep their corners firm and set. Next, have them push air rapidly through the opening, as though they are trying to blow a piece of rice off their lip. The air should be fast and centered. (If their lips do not vibrate, the student may be holding or stretching them too tightly, or they may need to

News

Mouthpiece School 101

The mouthpiece may be the most crucial equipment choice a student can make other than his/her trumpet playing. It is also the easiest thing to change in one’s playing to achieve a variety of colors and specialty techniques, such as lead playing or orchestral playing; a dark sound versus a bright sound. Trumpeters seem to be on a constant quest for the perfect mouthpiece. The question is, is it out there? The answer is, yes, but some trial and error is needed to find the one that is best suited for you. Throughout history, mouthpieces have been made from horns, wood, plastic, and brass. Though the mouthpiece has undergone some changes since its inception, its fundamental role has not. Air leaves the body through the oral cavity of the mouth, creates the lips to vibrate as the lips are tensed. The vibrations then enter the mouthpiece resulting in a specific tone, subject to the openness or closeness of the oral cavity, tongue placement, and aperture tightness or looseness. The resulting tone is then carried into the trumpet and amplified by the trumpet. Essentially, the mouthpiece is the core resonating factor in trumpet playing and the trumpet is only an amplification of the mouthpiece itself. With that being said, every trumpeter has a personal relationship with their mouthpiece. It has been selected from many, as the best feel, sound, rim, etc… But with so many small alterations that equal such dramatic differences, trumpeters seem to always be tinkering with their mouthpieces. You noticed I said mouthpieces, trumpet players just don’t have one, we have two, three, four and some people have managed to collect hundreds over their career. Why so many, easy, they’re looking for the holy grail of mouthpieces. Many have found it; many have not. If you have not, be patient, it’s out there, there’s one for all of us. A Compliment for Us A mouthpiece should compliment what your students are trying to do, not allow them to do something they can’t. A good mouthpiece will ease their high range, blow free and easy in the middle and low range, have a good pitch center, good endurance, and be comfortable on their lips at all times. But, under no circumstances should they be looking for a mouthpiece to suddenly supply them with all the answers they have been looking for in their playing. Again, a good mouthpiece suited for the genre of music they are playing will compliment them and help their playing, not fix musical or technical issues that are present during whichever mouthpiece they play. Patience After your student starts playing on their new mouthpiece, remind them to be patient. They may notice that their endurance and range diminishing somewhat over a couple of weeks. But, this is a natural effect after switching mouthpieces. When you switch mouthpieces, generally, there will be minute adjustments in the embouchure to allow for the new rim and added or reduced airflow resistances. If fatigue and soreness set in, have your trumpeter take a couple of days off to allow his new used embouchure muscles to recover and rebuild their strength. After a couple of days of rest, have them ease back into their playing routine with nice slow warm-ups that require little embouchure strength, pressure, and movement. In addition, have them concentrate on how the mouthpiece is feeling and reacting in their playing. Keeping a log is a good idea to track their progress during this transaction. As for their daily practice sessions, have them practice no longer than 45 minutes to an hour. You want them to exercise these new embouchure muscles, not deplete them. If they keep running the muscles to depletion each day, they will never build endurance because their muscles will be too tired and sore to snap back each day. After two to three weeks, they should have acclimated to the new mouthpiece and their muscles should have built up enough strength and endurance for them to return to their normal every routine. Selecting a Mouthpiece Have your trumpet student select a mouthpiece that is comfortable for them; however, does not compromise their sound and technique for comfort. Professional trumpeters play on all sorts of different mouthpiece sizes and brands, so there are many options. Have your student take their time in order to make the right decision. You or their private lesson teacher should accompany them in their quest for a new mouthpiece. Tips for Choosing a New Mouthpiece Before they try their new mouthpiece, make sure they warm-up and daily routine on their standard equipment. This will get them in shape and give them a basis for comparison. Choose a room with good acoustics. Too little or too much reverberation can alter the true sound production of the mouthpiece and trumpet combination. It is best, if possible to have them playtest their new mouthpiece in an environment you are familiar with the sound acoustics of. Having you or their teacher in front of the bell to hear the sound will be greatly different from the sound the student is hearing from behind the bell. You will make a difference being there for them. While trying their new mouthpiece, have them take frequent breaks so that their chops are as fresh as possible for each new mouthpiece they try. This allows for a fair comparison of equipment. If the student is trying more than one new mouthpiece, mix up the order of the mouthpiece they are trying so they do not become biased by knowing what mouthpiece they are trying. Chances are, they will be surprised which one they like because it may not be the one they were hoping for. Once they have chosen a new mouthpiece size they like, have them try playing several of the same size. Again, there are even small variations between like mouthpiece sizes. Once they find a new mouthpiece they like, remind them to give it a fair chance through the ups and downs of

News

Toxic Trumpets

Back in the days of chalk and erasers, the progress of the school day could be charted by the gradual buildup of chalk on the board. Squinting to distinguish my math problems from the gray powder of lingering dust that surrounds them – it must be close to lunchtime. Each day we looked forward to who would be chosen to clean the board with a wet sponge, magically revealing a glossy, pristine black surface. As brass players, we fall into the comfortable fiction that our instruments are clean inside. After all, the outside is so shiny! The ugly truth is this: what goes into our instruments stays there. Sugar in our saliva, particles of food, and whatever else the daily tooth brushing missed when we brushed after lunch. Didn’t brush after lunch? The onslaught intensifies: fire the artillery, bring on the chicken nuggets. Red Rot The brass used to make musical instruments is an alloy of zinc and copper – usually in a ratio of 30% to 70% respectively. In the most extreme cases of instrument neglect, the trumpet or brass instruments will develop red rot, which is the breakdown of the zinc portion of the alloy, leaving the metal weak and fragile. Red rot shows up as a reddish blotch on the outside of the brass. However, this is just the visible evidence; the pipe is being eaten away from the inside out, and eventually holes will develop. Once detected, red rot can be slowed, but eventually the affected tubing will need to be replaced. The lead pipe is the most common area for red rot to develop. This is the first stop for food particles, minerals, and acid in the saliva leaving the mouthpiece; most larger food particles get deposited here, although some continue through to other parts of the trumpet. Besides the lead pipe, other areas prone to corrosion are the tuning side crooks and the crook attached to the third valve casing. To prevent red rot or slow its progression, students should remove as much moisture from the trumpet as possible when they have finished playing. A proper and thorough cleaning once a month is key to preventing this problem, as well as maintaining the overall health and playability of the instrument. Share these simple guidelines with your students: Cleaning the Trumpet To clean the trumpet, the students will need to purchase a cleaning kit (available from the local music store) and a few common household supplies. The following items will be needed: Cleaning and Polishing the outside of the Trumpet The brass of a trumpet or other brass instruments is protected with either clear lacquer or silver plating. Acids in our perspiration break down this plating. If students do not wipe their instrument after they play, their sweat will dissolve the plating and eventually begin to eat through the brass itself. To protect their instruments’ finish, students should wipe the trumpet after each practice with a soft cotton cloth (e.g. an old t-shirt) to remove the oil and acid left by their hands. Students whose perspiration is very acidic need to be especially on top of this. Also, students should polish their instrument monthly with a cloth designed specifically for their finish (lacquer polish cloth or silver polish cloth). Liquid silver or lacquer polishes are also available, but these should only be used every six months; these strong chemicals will wear down the finish if overused. Removing the Valves for Cleaning Students should bathe their trumpet once a month to clean out all the previous month’s bacteria, food particles, and saliva deposits (acid) that are placed in the trumpet each day. If they clean their trumpet on a monthly basis, their instrument will perform better, as well as smelling and looking better. If you’re serious about having clean instruments in your band, you will have to walk students through the cleaning process in class. While some of this can be done verbally, you’ll want to actually show them how to safely remove the valves, as this is a very delicate procedure! When the valve is inserted correctly, the holes of the valve will actually line up with the holes in the valve casing. Have students observe this for themselves by pressing down the valve key, removing the corresponding valve slide, and looking into the valve slide opening. If the valve is in the wrong casing or is facing the wrong way, the holes will not correspond, obstructing the airflow. As you prepare them to remove the valves, let them know that the valves are the most delicate part of the trumpet; dropping one can have disastrous consequences. Have students place the trumpet on their lap, with the bell facing to the right. Then have them unscrew the top valve cap on the first valve. Slowly pull the valve straight up, halfway. There may be a small “1” stamped on it, signifying that it is the first valve. Now have them look for the valve guide, a small piece of plastic or brass located near the bottom of the spring inside the valve. Both sides of the valve guide protrude from the valve, locking it into place when the valve is inserted into the valve casing. Students should observe that one side of the protruding valve guide is a little larger than the other. Have them observe whether the large or small side of the valve guide is facing them; they will need this information to correctly re-assemble the trumpet. If they make a mistake, the holes in the valve will not line up with its slide, and air will not be able to pass through. Have them practice this step with you and make sure all their questions are answered, so they feel confident in bathing their instrument at home, with their parents’ guidance. Preparing the Trumpet for the Bath As you walk students through the process of bathing their trumpet, emphasize to them that they should use only liquid soap, not detergent, for

News

Trumpet Mutes

Almost every band director has the sensation of browsing through a music catalog and entering in a kind of trance, faced with endless choices of equipment of every description. With the various shapes, materials, and brands available, trumpet mutes can be particularly trance-inducing, particularly for someone who is not a brass player. This article should help reduce some of the confusion surrounding the many materials and styles available, as well as providing some concrete suggestions you can give your students as they are learning to play with mutes. First of all, a mute is an object inserted in the bell of a trumpet which slightly muffles the instrument’s vibration. Although mutes will make the trumpet quieter, their primary purpose is to alter the tone color to achieve a particular effect. The typical mute is held in the bell by three strips of cork along the side of the mute, so there is an air pocket between the mute and the bell. This type of mute has a hole in the top, through which a portion of the sound waves from the trumpet pass into the mute and are absorbed or reflected back by the mute cavity. The vibrating air pocket between the mute and the bell then blends the unmuted trumpet sound and the muted vibrations in complex ways. This characteristic blend of sound is transmitted out the trumpet bell, and gives each mute its characteristic timbre. Mutes may be made from cardboard, aluminum, brass, copper, synthetics or polymers, or combinations of materials. Mutes may also consist of cloth bags or other soft material that yields the desired sound quality. Occasionally a composer will ask for the player to mute the sound simply by playing into the music stand, by leaning in toward the stand. The bell should be about six inches from the stand (if the student leans in too far the pitch will start to go flat). The resulting sound will be more diffuse and less directional. Directors can use this technique to make a single trumpeter or a section of trumpeters sound distant. This effect can be used if the music states “in hat” and the student does not own a hat mute. Playing with a Mute Since mutes are placed in the path of the trumpet’s air column, they have the possibility of slightly altering the trumpet’s pitch. In general, mutes that go into the bell may make the pitch sharp, since the air column is being effectively shortened. Mutes placed in front of the bell, such as a cloth bag or plunger, are effectively lengthening the air column, and may flatten the pitch. One of the characteristics of a good mute is that it affects the trumpet’s intonation only minimally. Students should always practice their band, orchestra, or solo music as it is marked, including mute changes, since the mute will slightly affect not only intonation, but also responsiveness and volume. They will also need to practice coordinating the insertion and removal of the mute when the changes are fast. A tuner will help students to find the correct adjustment for their main tuning slide when the mute is inserted and removed (typically about a quarter of an inch adjustment or less). Students can place a pencil mark on the tuning slide to serve as a quick reference during practices and performances. In addition to affecting the intonation, most mutes will tend to dull the articulation slightly, so the students will typically need to use more air and articulate more heavily to compensate. The articulation of the open trumpet will feel much easier and faster by comparison. Mute Choices and Markings Although performers will often be the ones making the choices about mutes in jazz and other improvised styles, printed music will specify when to place and remove mutes. If the music doesn’t specify the type of mute, then a straight mute is assumed, although the director or player may experiment with other mutes until the desired sound is achieved. If the composer wants something other than a straight mute, the direction will be printed above or below the staff. Students will typically see the direction “mute” to apply the mute, and “open” or “without mute” for the next passage played without the mute. The Italian con sordino (“with mute”) or senza sordino (“without mute”) may also be used. Mutes in the Band Classroom Across the various types and brands of mutes, the qualities of a good mute remain the same: (1) consistency in all pitch and dynamic ranges, (2) ease of response, (3) secure, stable fit in the trumpet bell, (4) minimal change in intonation, (5) desired sound quality, and (6) ability to easily produce the desired volume of the passage being played. Because mutes vary somewhat in terms of material and construction, directors should optimally decide on one particular mute brand and style for your trumpet section to use. If possible, try to purchase a matched set of mutes for the band to own, which the students can check out when needed. Alternatively, you can have your trumpeters buy the type and brand that you specify at the beginning of the school year. When choosing a brand for your trumpet section, make sure you like the sound of the mute you’re about to order. If you are not familiar with the sounds of various styles available, ask a professional brass player or teacher to demonstrate some different mutes for you. Explain to them what pieces you are preparing, and be specific in the type of sound you are looking for in a mute. They should be able to point you in the right direction. Mutes have no place in the beginning band year. It is not until the seventh-grade year when the band begins preparing contest literature that you will need to start thinking about mutes. At the middle school level, a set of straight mutes will be adequate if you don’t have a jazz program. A jazz program at any level

News

Advantages of Starting Young Trumpet Students on Cornet

Introducing young students to brass instruments requires careful consideration to ensure a positive experience on their fresh, musical journey. Deciding to start young trumpet students on the cornet, rather than the trumpet, presents several advantages with minimal drawbacks. While the trumpet and cornet share the same length of tubing, their main distinction lies in their respective shapes. The cornet features a more compact and conical shape, while the trumpet exhibits an elongated cylindrical form. Understanding the differences between conical and cylindrical shapes is crucial. The conical shape of the cornet entails a gradual widening from the mouthpiece to the bell, resembling an ice-cream cone. This shape promotes a more focused and mellow sound, offering better control over intonation and enhanced responsiveness for softer dynamics. Conical instruments, including the cornet, are renowned for their warm and rich sound. On the other hand, cylindrical shapes maintain a consistent diameter throughout the length of the instrument. This shape enables a brighter and more powerful sound, lending versatility and the ability to produce a wide range of dynamic and expressive sound to cylindrical instruments like the trumpet. Selecting between conical (Cornet) and cylindrical (Trumpet) instruments depends on the desired sound and playing style. Conical shapes generally provide a more lyrical and expressive quality, while cylindrical shapes deliver a more brilliant and projecting sound. One of the primary advantages of starting young trumpet students on the cornet is the improved tone production it offers. The cornet’s conical bore and mellower sound provide a gentle introduction to brass playing. Its smaller bore diameter encourages students to focus on embouchure, breath control, and technique, establishing a solid foundation for future trumpet playing. The conical shape of the cornet’s bore contributes to improved tone production in several ways. Firstly, the gradual widening of the bore from mouthpiece to bell allows for a more focused and centered sound. This means that the vibrations produced by the player’s lips are channeled, focused, and concentrated, resulting in a more centered and mellow tone. Additionally, the conical shape facilitates better control of intonation. As the diameter of the bore gradually increases, it helps to balance the harmonics and overtones produced by the instrument, leading to more accurate and in-tune playing, particularly in the lower register. Lastly, the conical shape provides enhanced responsiveness at softer dynamics. The gradual tapering of the bore allows for a quicker and more controlled response when playing at lower volumes. This is particularly useful in melodic and lyrical passages where a gentle and expressive tone is desired. Overall, the conical shape of the cornet contributes to a warm, rich, and expressive sound, making it an excellent choice for beginners and those seeking a mellower tone. Another advantage of starting young trumpet students on the cornet is the better weight and balance it offers. The cornet’s compact and balanced design allows for easier and more comfortable playing. Its smaller size and lighter weight reduce strain and fatigue, enabling students to concentrate on developing embouchure, maintaining proper hand position, finger technique, and overall musicality. These attributes also make it more manageable for students who are smaller or have a delicate physical build. In contrast, the weight of a trumpet tends to be heavier at the bell, which can contribute to more tension in the wrists, especially for beginners. With the cornet, the weight of the instrument tends to be distributed and balanced towards the backside, near the shepherd crook in the bell and mouthpiece, resulting in a more balanced and ergonomic playing experience. Furthermore, the cornet’s bell, positioned closer to the student’s ears, enhances sound perception and clarity. Being in close proximity to the instrument allows young learners to hear their sound development more clearly, providing immediate feedback on tone, pitch, and intonation. This improved auditory understanding leads to quicker progress and higher levels of musical expression. Moreover, starting on the cornet cultivates a heightened sensitivity to sound. Students learn to listen attentively to their own playing, developing a discerning ear for intonation, tone quality, and musical expression. This keen sense of sound awareness enhances their ability to play in tune and blend effectively with other musicians, fostering a well-rounded and accomplished musician. Starting on the cornet offers a seamless transition to the trumpet. Skills and techniques acquired on the cornet effortlessly transfer to the trumpet. Students with a solid foundation in tone production, technique, and musical interpretation experience a smoother transition, minimizing frustration when learning a new instrument. This continuity allows them to focus on refining their skills rather than starting from scratch, thereby accelerating their progress. Beyond the musical benefits, starting on the cornet builds confidence in young trumpet students. As they develop their skills on a more manageable instrument, they gain a sense of accomplishment and self-assurance. This confidence carries over to their trumpet playing, enabling them to tackle more challenging musical passages and perform with greater ease. It is worth noting that the only true disadvantage to starting on the cornet arises when only one student in a beginner class begins on the cornet. In such cases, it is essential for the teacher to explain during the first class that there is no significant difference between starting on the cornet versus the trumpet. The teacher must address any concerns or questions from the other students regarding the cornet player(s) in the class, providing accurate and comprehensive information about both instruments. The goal is to create an inclusive and cohesive group dynamic, ensuring that the student on the cornet does not feel singled out or left behind. In closing, starting young trumpet students on the cornet offers numerous advantages that significantly impact their musical development. The improved tone production, better weight and balance, seamless transition to the trumpet, enhanced sound development, and heightened sensitivity to sound are just a few of the benefits. Moreover, starting on the cornet builds valuable skills, fosters confidence, and cultivates a lifelong passion for music. The cornet serves as an ideal and practical starting point, setting young student musicians on a

Scroll to Top

Inside Gemini